Wednesday, February 8, 2012

Friday, February 3, 2012
I love both my jobs!

This picture was taken when Ada was about 4 months old or so. Here I am breastfeeding, but you probably couldn't tell. Do you spot Ada?? Her foot is sticking out in the bottom right corner!
About 3 months ago I began a part-time (6 hours or less per week), at-home job as a breastfeeding peer counselor for the WIC program. With this job, I basically build relationships with women in the community and help them get a good start in breastfeeding. Many days when Chris comes home from work I say, "I just love BOTH my jobs!"
Here are my favorite things about my job:
1. As I continue to learn about pregnancy and breastfeeding, I am constantly amazed at how truly incredible a woman's body is. Women, have you ever stopped to think about this?? I can't believe all of the changes my body has undergone within the last 2 years! I have a much deeper appreciation for how God created my body, that I want to honor and take care of it more. I love that a woman's body is beautiful, life-giving, and accommodating to the many changes it goes through.. I am so glad I'm a woman!
2. I love connecting with other moms, especially since it's harder to socialize with other adults after having kids. When you become a mom, you instantly are able to connect with any other mom, regardless of class, race, language, religion, etc.
3. I love holistically helping women and children and making a difference in their lives.
The hardest thing about my job:
The actions of many hospitals (not all) and OBs can make it very difficult for women to breastfeed. It makes me feel sad because breastfeeding is probably one of the healthiest things for a woman and baby to do, yet I've discovered that many medical professionals don't make it a priority to be educated about breastfeeding or committed to helping women get started. Almost weekly, I hear from my clients of truly wrong advice or actions given/done by medical professionals which has prevented women from breastfeeding at all, or made it extremely difficult to get a good start. To be a well-informed patient is to be in charge of you and your children's health.
I hope to include more posts about breastfeeding in the future to help you (men and women) to be more informed and excited about breastfeeding!
Tuesday, January 31, 2012
Greek Geek
I'm a little disappointed....one blog post for January. I'm still trying to get the hang of this blog thing, while balancing life of stay at home mom, and being a breastfeeding peer counselor. Ok, but here is something I've done in January...I've fallen in love with Greek yogurt! It is more natural and simple, much cheaper, and tastes way better than store bought! And, it is SUPER easy to make! I regret I didn't learn to do this years ago!
How to make Greek yogurt!
It's so easy, there's really no need for pictures...
What you need:
Already prepared yogurt with active cultures (look on the container to make sure it says this)
1/2 gallon milk (any kind of cow's milk, I haven't experimented with soy milk yet)
Thermometer (digital is best)
Mesh strainer
Cheesecloth (found in the fabric section of Wal-mart for about $5.)
1. Heat 1/2 gallon milk (whole, low-fat, or skim) on the stove until it reaches 180 degrees. Stir constantly to keep the milk from burning on the bottom. (about 20 minutes)
2. Transfer heated milk to another large container, preferably one that is plastic or glass. Do not cover. Let the milk sit until it cools to between 105 and 110 degrees. (about 25 minutes)
3. While waiting for the milk to cool, mix together in a small cup 2 tablespoons milk, and either 2 tablespoons already prepared plain Greek yogurt or 3 tablespoons already prepared plain yogurt. (Make sure the yogurt contains active cultures! It should say on the label of the container).
4. When milk cools to between 105 and 110 degrees, stir in the milk-yogurt mixture.
5. Cover the cooled milk with a lid or plastic wrap. Wrap the bowl in a towel. Turn on your oven light. Put the wrapped bowl in the oven (make sure the towel is not near the oven light). Leave in the oven for 7 to 8 hours. If left in longer than 8 hours it has a more tart taste.
At this point you have made regular yogurt! Good job! Wasn't that easy? and CHEAP?! Read on for Greek yogurt...
6. Put the homemade yogurt in the fridge to chill for about 2 hours.
7. Over a large bowl, place a mesh strainer lined with 3-4 layers of damp cheesecloth. Pour the yogurt into the cheesecloth-mesh strainer and cover with plastic wrap. Place in the fridge to strain for 4-6 hours, or until it reaches in the thickness you like. (The yellow liquid leftover is called whey, which is super healthy for you, but I haven't found a good use for it yet.)Then transfer the Greek yogurt to a convenient container for storage. Remember to save about 2 tablespoons to use for your next batch of yogurt!
How to eat Greek yogurt:
1. Mix with some sugar (or honey or agave syrup), vanilla extract, and thawed frozen berries, or fresh fruit. (My favorite)
2. Make tsaziki sauce and use in gyros or kabobs.
3. Plain--a healthy alternative to sour cream (Ada's favorite)
4. Plain--dip herbed foccacia bread into it. You can also add some spices and herbs to the yogurt. (Chris' favorite)
Price difference? With the half-gallon of milk, you make about 6 containers of Greek yogurt at the store. Greek yogurt sells for about $1 per container. So, with a half gallon of milk (about $1.50) you made about 6 servings of Greek yogurt. That's only $0.25 per serving! A savings of 75 percent!
Anyways, Ada is now 13.5 months old. She's not walking unassisted yet, but I know she is close! I absolutely love this stage that she's in right now. I'm amazed at how much she understands and how much she is communicating (though I don't always know what she is saying). She is definitely a chatty girl! Ada has also been somewhat consistent at communicating with sign language for things like "all done" "more" and "milk." and points to things she wants. She says "mama" "dada" and "DAAAHdah,"which means doggie. Here is a pic I snapped of her recently that shows her infatuation with the dog.

How to make Greek yogurt!
It's so easy, there's really no need for pictures...
What you need:
Already prepared yogurt with active cultures (look on the container to make sure it says this)
1/2 gallon milk (any kind of cow's milk, I haven't experimented with soy milk yet)
Thermometer (digital is best)
Mesh strainer
Cheesecloth (found in the fabric section of Wal-mart for about $5.)
1. Heat 1/2 gallon milk (whole, low-fat, or skim) on the stove until it reaches 180 degrees. Stir constantly to keep the milk from burning on the bottom. (about 20 minutes)
2. Transfer heated milk to another large container, preferably one that is plastic or glass. Do not cover. Let the milk sit until it cools to between 105 and 110 degrees. (about 25 minutes)
3. While waiting for the milk to cool, mix together in a small cup 2 tablespoons milk, and either 2 tablespoons already prepared plain Greek yogurt or 3 tablespoons already prepared plain yogurt. (Make sure the yogurt contains active cultures! It should say on the label of the container).
4. When milk cools to between 105 and 110 degrees, stir in the milk-yogurt mixture.
5. Cover the cooled milk with a lid or plastic wrap. Wrap the bowl in a towel. Turn on your oven light. Put the wrapped bowl in the oven (make sure the towel is not near the oven light). Leave in the oven for 7 to 8 hours. If left in longer than 8 hours it has a more tart taste.
At this point you have made regular yogurt! Good job! Wasn't that easy? and CHEAP?! Read on for Greek yogurt...
6. Put the homemade yogurt in the fridge to chill for about 2 hours.
7. Over a large bowl, place a mesh strainer lined with 3-4 layers of damp cheesecloth. Pour the yogurt into the cheesecloth-mesh strainer and cover with plastic wrap. Place in the fridge to strain for 4-6 hours, or until it reaches in the thickness you like. (The yellow liquid leftover is called whey, which is super healthy for you, but I haven't found a good use for it yet.)Then transfer the Greek yogurt to a convenient container for storage. Remember to save about 2 tablespoons to use for your next batch of yogurt!
How to eat Greek yogurt:
1. Mix with some sugar (or honey or agave syrup), vanilla extract, and thawed frozen berries, or fresh fruit. (My favorite)
2. Make tsaziki sauce and use in gyros or kabobs.
3. Plain--a healthy alternative to sour cream (Ada's favorite)
4. Plain--dip herbed foccacia bread into it. You can also add some spices and herbs to the yogurt. (Chris' favorite)
Price difference? With the half-gallon of milk, you make about 6 containers of Greek yogurt at the store. Greek yogurt sells for about $1 per container. So, with a half gallon of milk (about $1.50) you made about 6 servings of Greek yogurt. That's only $0.25 per serving! A savings of 75 percent!
Anyways, Ada is now 13.5 months old. She's not walking unassisted yet, but I know she is close! I absolutely love this stage that she's in right now. I'm amazed at how much she understands and how much she is communicating (though I don't always know what she is saying). She is definitely a chatty girl! Ada has also been somewhat consistent at communicating with sign language for things like "all done" "more" and "milk." and points to things she wants. She says "mama" "dada" and "DAAAHdah,"which means doggie. Here is a pic I snapped of her recently that shows her infatuation with the dog.

 |
| Ada walking with mama |
 |
| Ada loves to read in her chair! |
Monday, December 26, 2011
Listening for Heartbeats and Cranberry Margs
We had a just a wonderful, beautiful Christmas weekend filled with lots of sugar, laughs, family, and presents. It is so much fun to give and receive gifts! Chris and I also celebrated our 2-year anniversary with a little getaway (baby-free) in Des Moines. Ada and I both survived and did wonderfully away from each other. It was actually harder on me being away from her!
My favorite part of Christmas this year though, happened late last night, just a few minutes past midnight. Ada was in a nearby room fast asleep. Chris had just dipped off into a deep doze, and I was laying peacefully awake, my head pressed against his back so I could hear his heartbeat. It was so still and quiet in the night, that when his heart would beat, I could feel it pulse against my ear. I laid there, just enjoying this quiet moment, and thanking God that I had my living, breathing, heart-beating, warm, wonderful love of my life with me. God is so good to give me a partner and lover to walk this wonderful life with me.
On another note, I just have to share this recipe for Cranberry Margaritas by yours truly. This is by far my favorite holiday drink. Here it is:
Cranberry Margaritas (makes two 7oz drinks)
Ingredients:
Tequila (gold)
Triple Sec
100 % Cranberry Juice
1 orange
Sugar
Ice cubes
Line rim of two glasses with sugar (get wet and dip in sugar bowl), and put 3-4 ice cubes in each glass. Cut a 1/4 section out of an orange. In a cocktail mixer or bowl or something, mix 1.5 oz triple sec, 2.5 oz tequila, 14oz of cranberry juice, and the squeezed juice from the orange piece. Mix or stir well. Cut the leftover squeezed orange piece into two pieces and stick them in the glasses. Pour the drink into each glass and stir to distribute coldness.
My favorite part of Christmas this year though, happened late last night, just a few minutes past midnight. Ada was in a nearby room fast asleep. Chris had just dipped off into a deep doze, and I was laying peacefully awake, my head pressed against his back so I could hear his heartbeat. It was so still and quiet in the night, that when his heart would beat, I could feel it pulse against my ear. I laid there, just enjoying this quiet moment, and thanking God that I had my living, breathing, heart-beating, warm, wonderful love of my life with me. God is so good to give me a partner and lover to walk this wonderful life with me.
On another note, I just have to share this recipe for Cranberry Margaritas by yours truly. This is by far my favorite holiday drink. Here it is:
Cranberry Margaritas (makes two 7oz drinks)
Ingredients:
Tequila (gold)
Triple Sec
100 % Cranberry Juice
1 orange
Sugar
Ice cubes
Line rim of two glasses with sugar (get wet and dip in sugar bowl), and put 3-4 ice cubes in each glass. Cut a 1/4 section out of an orange. In a cocktail mixer or bowl or something, mix 1.5 oz triple sec, 2.5 oz tequila, 14oz of cranberry juice, and the squeezed juice from the orange piece. Mix or stir well. Cut the leftover squeezed orange piece into two pieces and stick them in the glasses. Pour the drink into each glass and stir to distribute coldness.
Sunday, December 11, 2011
Happy Birthday Miss Ada
Well, I no longer have a lil baby, Ada is now my "lil girl." She's let me know the last two months or so that she is definitely not my baby anymore, but yesterday we finally got to celebrate my lil girl turning ONE.
Ada was completely oblivious that it was that party was for her, and she was pretty disinterested in her birthday cake, but she did think the glowing candle was pretty cool. She only had about two bites of her cake, which I was totally OK with. I've heard of babies devouring their birthday cakes and having crazy sugar rush highs, and I was happy to avoid that. For the special birthday treats I made strawberry cupcakes with cream cheese frosting. I'm really not much of a baker, but they were a hit! If you want the recipe, click here. Also, my sister and I have been on a big sangria kick. We've been serving it at the last 3 parties we've hosted, and it's delicious! Here's the recipe for that:
Sangria for a Crowd:
1 bottle pink wine
some brandy (to taste)
Peach sparkling water
Strawberry sparkling water
fresh or frozen berry fruits
Add the wine, some brandy, the fruit, and some each of the sparkling waters. Taste. Add more brandy or sparkling waters to taste. Serve in a punch bowl, pour over ice in individual cups. ( guessing it makes around 40 4oz. servings)


Here's what I learned:
Chris and I really love our family a LOT! It was so great that there is so much love and joy crammed together in a small space when both of our families get together. We are so thankful that our families really welcome and love each other to create an even bigger, louder, funnier, more loving family.
To keep your sanity and maintain your stress, do the one thing you're good at. For me, that was the food prep. I delegated everything else to other people.
Lastly, as I was cleaning up and throwing away all of the streamers and other disposable decorations, I realized that I need to come up with a better solution for party decorating. I want to build up a supply of reusable party decorations (streamers, tablecloths, vases, signs, centerpieces, etc). I came up with this after thinking about how many more birthday parties, bridal showers, baby showers, ladies parties, that I will be hosting throughout my lifetime. I really don't want to buy new paper products each time, but would rather just open up my linen closet and pull out the few things I already have, saving time and money. I could even have a set that is "girly" (girls birthday parties, bridal and baby showers) and a set that is "neutral" (for things like boys birthday parties, or parties that aren't girl only). I could make all of these things myself or buy them secondhand from garage sales and Goodwill. I'm not convinced that I should give up disposable dinnerware (plates, napkins, cups, silverware) just yet, only because cleaning up is soooo much easier with them.
On to ,more adventures with a one year old!!
Ada was completely oblivious that it was that party was for her, and she was pretty disinterested in her birthday cake, but she did think the glowing candle was pretty cool. She only had about two bites of her cake, which I was totally OK with. I've heard of babies devouring their birthday cakes and having crazy sugar rush highs, and I was happy to avoid that. For the special birthday treats I made strawberry cupcakes with cream cheese frosting. I'm really not much of a baker, but they were a hit! If you want the recipe, click here. Also, my sister and I have been on a big sangria kick. We've been serving it at the last 3 parties we've hosted, and it's delicious! Here's the recipe for that:
Sangria for a Crowd:
1 bottle pink wine
some brandy (to taste)
Peach sparkling water
Strawberry sparkling water
fresh or frozen berry fruits
Add the wine, some brandy, the fruit, and some each of the sparkling waters. Taste. Add more brandy or sparkling waters to taste. Serve in a punch bowl, pour over ice in individual cups. ( guessing it makes around 40 4oz. servings)


 |
| Grandpa John (my Dad) and Ada |


 |
| Miss Ada's Birthday Outfit |
Here's what I learned:
Chris and I really love our family a LOT! It was so great that there is so much love and joy crammed together in a small space when both of our families get together. We are so thankful that our families really welcome and love each other to create an even bigger, louder, funnier, more loving family.
To keep your sanity and maintain your stress, do the one thing you're good at. For me, that was the food prep. I delegated everything else to other people.
Lastly, as I was cleaning up and throwing away all of the streamers and other disposable decorations, I realized that I need to come up with a better solution for party decorating. I want to build up a supply of reusable party decorations (streamers, tablecloths, vases, signs, centerpieces, etc). I came up with this after thinking about how many more birthday parties, bridal showers, baby showers, ladies parties, that I will be hosting throughout my lifetime. I really don't want to buy new paper products each time, but would rather just open up my linen closet and pull out the few things I already have, saving time and money. I could even have a set that is "girly" (girls birthday parties, bridal and baby showers) and a set that is "neutral" (for things like boys birthday parties, or parties that aren't girl only). I could make all of these things myself or buy them secondhand from garage sales and Goodwill. I'm not convinced that I should give up disposable dinnerware (plates, napkins, cups, silverware) just yet, only because cleaning up is soooo much easier with them.
On to ,more adventures with a one year old!!
Monday, November 28, 2011
Rich Man's Meals
Chris and I are choosing to live on a tight budget now so that we can quickly pay off debt, save, invest, and be millionaires in a few decades. We also value healthy eating, and are learning ways to get the best of both worlds of eating healthfully and cheaply.
We call these meals "Rich Man's Meals" because by eating "poor" now, we will be eating "rich" later!
The official poor man's meal: In a pan heat some olive oil, when heated add a clove or two of minced garlic, and cook for about a minute. Add 1 can of diced tomatoes with green chiles, 1 can of kidney beans (drained and rinsed well), some chili powder and basil to taste. Serve over warm rice (brown is healthier, but I like the taste of white better).

Bean Burritos: In a bowl mix one can pinto beans (drained and rinsed well), and one can fat-free & preservative free refried beans. When I say "preservative-free," look at the list of ingredients on the can. If you know what all the ingredients are then buy it. If you don't know what some of the ingredients are, then don't buy it. Aldi's sells fat-free & preservative free refried beans. Spread bean mixture in a tortilla and roll it up. Top with cheese and microwave for about 1 minute 30 seconds. Top with salsa.
Eggs and toast. Eggs are a great source of protein and are very healthy in moderation. I don't pay more than $1.08 for a dozen eggs unless I'm desperate. Use 100% whole wheat toast. Or eat with pancakes if you're feeling really rich!
All rich man's meals are served with a very generous side of steamed or fresh vegetables. These meals also take little time to prepare, so we usually eat these meals on busy nights.
Also calling them "Rich Man's Meals" really helps you happily and gratefully eat a poor man's meal and help you stay motivated in your choice to live cheap now.
What's your family's rich man's meal?
We call these meals "Rich Man's Meals" because by eating "poor" now, we will be eating "rich" later!
The official poor man's meal: In a pan heat some olive oil, when heated add a clove or two of minced garlic, and cook for about a minute. Add 1 can of diced tomatoes with green chiles, 1 can of kidney beans (drained and rinsed well), some chili powder and basil to taste. Serve over warm rice (brown is healthier, but I like the taste of white better).

Bean Burritos: In a bowl mix one can pinto beans (drained and rinsed well), and one can fat-free & preservative free refried beans. When I say "preservative-free," look at the list of ingredients on the can. If you know what all the ingredients are then buy it. If you don't know what some of the ingredients are, then don't buy it. Aldi's sells fat-free & preservative free refried beans. Spread bean mixture in a tortilla and roll it up. Top with cheese and microwave for about 1 minute 30 seconds. Top with salsa.
All rich man's meals are served with a very generous side of steamed or fresh vegetables. These meals also take little time to prepare, so we usually eat these meals on busy nights.
Also calling them "Rich Man's Meals" really helps you happily and gratefully eat a poor man's meal and help you stay motivated in your choice to live cheap now.
What's your family's rich man's meal?
Monday, November 7, 2011
Teefers
Today Ada has 4.5 teeth. 2.5 on top, 2.5 on the bottom. I thought her smile without teeth was adorable, but now her smile is even more lovable! Teething has been one of the hardest challenges in motherhood.

When Ada was preparing her bottom teeth to come in, she was drooling so much that I'd have to change her shirt in the middle of the day because it was soaked, and she started to get a rash on her cheeks and neck because her skin was too sensitive for her saliva. If your child has this problem, breastmilk applied to the skin helps heal rashes, and have your baby wear a bib or change clothes often.
The bottom two teeth were a breeze compared to the upper teeth cutting through! The two nights before the uppers popped through, she would wake up screaming in agonizing pain. I ended up giving her baby Advil those two nights to help with the pain. As a general rule, we use drugs as a last resort in our house and rely more on natural treatments for ailments. For Ada, because she can't communicate, I will only give her Advil if I am 95% or more sure that she's crying because of teething pain, and its at night when she's trying to sleep. When you hear your child crying, it could be any number of things (gas, tired, moody, hungry, dirty diaper, teething), and it's hard to pinpoint what exactly they need.
During the day, these are what I've found useful to ease teething pain.
*cold wet wash cloth (I would keep a glass bowl in the fridge, fill it with ice water, and stick 2-3 washcloths in it to have them ice cold and ready)
*homemade popsicles (these were Ada's favorite! I would fill them with just water, or water and a tiny splash of juice)
*melon rinds (stick them in the fridge or freezer, and WASH THE RIND SKIN! remember the listeria and cantaloupe scare we had a few months ago?)
*cold celery
*cold apple fingers (slices of peeled apple, or an apple core)


When Ada was preparing her bottom teeth to come in, she was drooling so much that I'd have to change her shirt in the middle of the day because it was soaked, and she started to get a rash on her cheeks and neck because her skin was too sensitive for her saliva. If your child has this problem, breastmilk applied to the skin helps heal rashes, and have your baby wear a bib or change clothes often.
The bottom two teeth were a breeze compared to the upper teeth cutting through! The two nights before the uppers popped through, she would wake up screaming in agonizing pain. I ended up giving her baby Advil those two nights to help with the pain. As a general rule, we use drugs as a last resort in our house and rely more on natural treatments for ailments. For Ada, because she can't communicate, I will only give her Advil if I am 95% or more sure that she's crying because of teething pain, and its at night when she's trying to sleep. When you hear your child crying, it could be any number of things (gas, tired, moody, hungry, dirty diaper, teething), and it's hard to pinpoint what exactly they need.
During the day, these are what I've found useful to ease teething pain.
*cold wet wash cloth (I would keep a glass bowl in the fridge, fill it with ice water, and stick 2-3 washcloths in it to have them ice cold and ready)
*homemade popsicles (these were Ada's favorite! I would fill them with just water, or water and a tiny splash of juice)
*melon rinds (stick them in the fridge or freezer, and WASH THE RIND SKIN! remember the listeria and cantaloupe scare we had a few months ago?)
*cold celery
*cold apple fingers (slices of peeled apple, or an apple core)

This was back in summer time when her teeth were just starting to cut through.
Lastly, I haven't been able to blog as much lately because of transitioning into my part-time at home job as a breastfeeding peer counselor for WIC, and I've fallen in love with reading this incredible magazine called Mothering (parenting through natural and alternative ways) and have been learning so much!
Sunday, October 30, 2011
An Interesting Sunday
On this Sunday
1. I had a pomegranate for the first time. Yum! I made a salad with the pomegranate (only $1 at Aldi this week), cut apples, fresh spinach, and greek vinaigarette (I like Aldi's "Grandessa" brand best!). Yum times two!
2. Ada had peanut butter for the first time.
3. Ada broke out in hives for the first time. I called my Mom (an RN) and she told me to call First Nurse. Turns out, she's mildly allergic to peanuts. (I bet she will outgrow it though) No more tasting peanuts until she is a wee bit older.
5. Ada had baby benadryl for the first time. Yucky. You know how when you drink yucky tasting medicine, you kind of do a spastic shiver and shake because it's so gross? She did that, and it was pretty cute. :)
Ada, Chris, and Charlie (our dog) are all snoozing, and I'm listening to "early jazz" station on Pandora, will be reading books and pamphlets about breastfeeding (learning SO much!) for my job, and flipping through these magazines I borrowed from the library : Mothering (all about natural, simple, and healthful parenting!), Real Simple (Nov. 2009), Martha Stewart Living (Nov. 2009), Better Homes and Gardens (Nov. 2010), and Everyday with Rachael Ray (Nov. 2009).

Fellow moms, what do you like to do when your family is snoozing on a slow Sunday afternoon?
1. I had a pomegranate for the first time. Yum! I made a salad with the pomegranate (only $1 at Aldi this week), cut apples, fresh spinach, and greek vinaigarette (I like Aldi's "Grandessa" brand best!). Yum times two!
2. Ada had peanut butter for the first time.
3. Ada broke out in hives for the first time. I called my Mom (an RN) and she told me to call First Nurse. Turns out, she's mildly allergic to peanuts. (I bet she will outgrow it though) No more tasting peanuts until she is a wee bit older.
5. Ada had baby benadryl for the first time. Yucky. You know how when you drink yucky tasting medicine, you kind of do a spastic shiver and shake because it's so gross? She did that, and it was pretty cute. :)
 |
| Children's benadryl and a pomegranate on the chopping board. |
Ada, Chris, and Charlie (our dog) are all snoozing, and I'm listening to "early jazz" station on Pandora, will be reading books and pamphlets about breastfeeding (learning SO much!) for my job, and flipping through these magazines I borrowed from the library : Mothering (all about natural, simple, and healthful parenting!), Real Simple (Nov. 2009), Martha Stewart Living (Nov. 2009), Better Homes and Gardens (Nov. 2010), and Everyday with Rachael Ray (Nov. 2009).
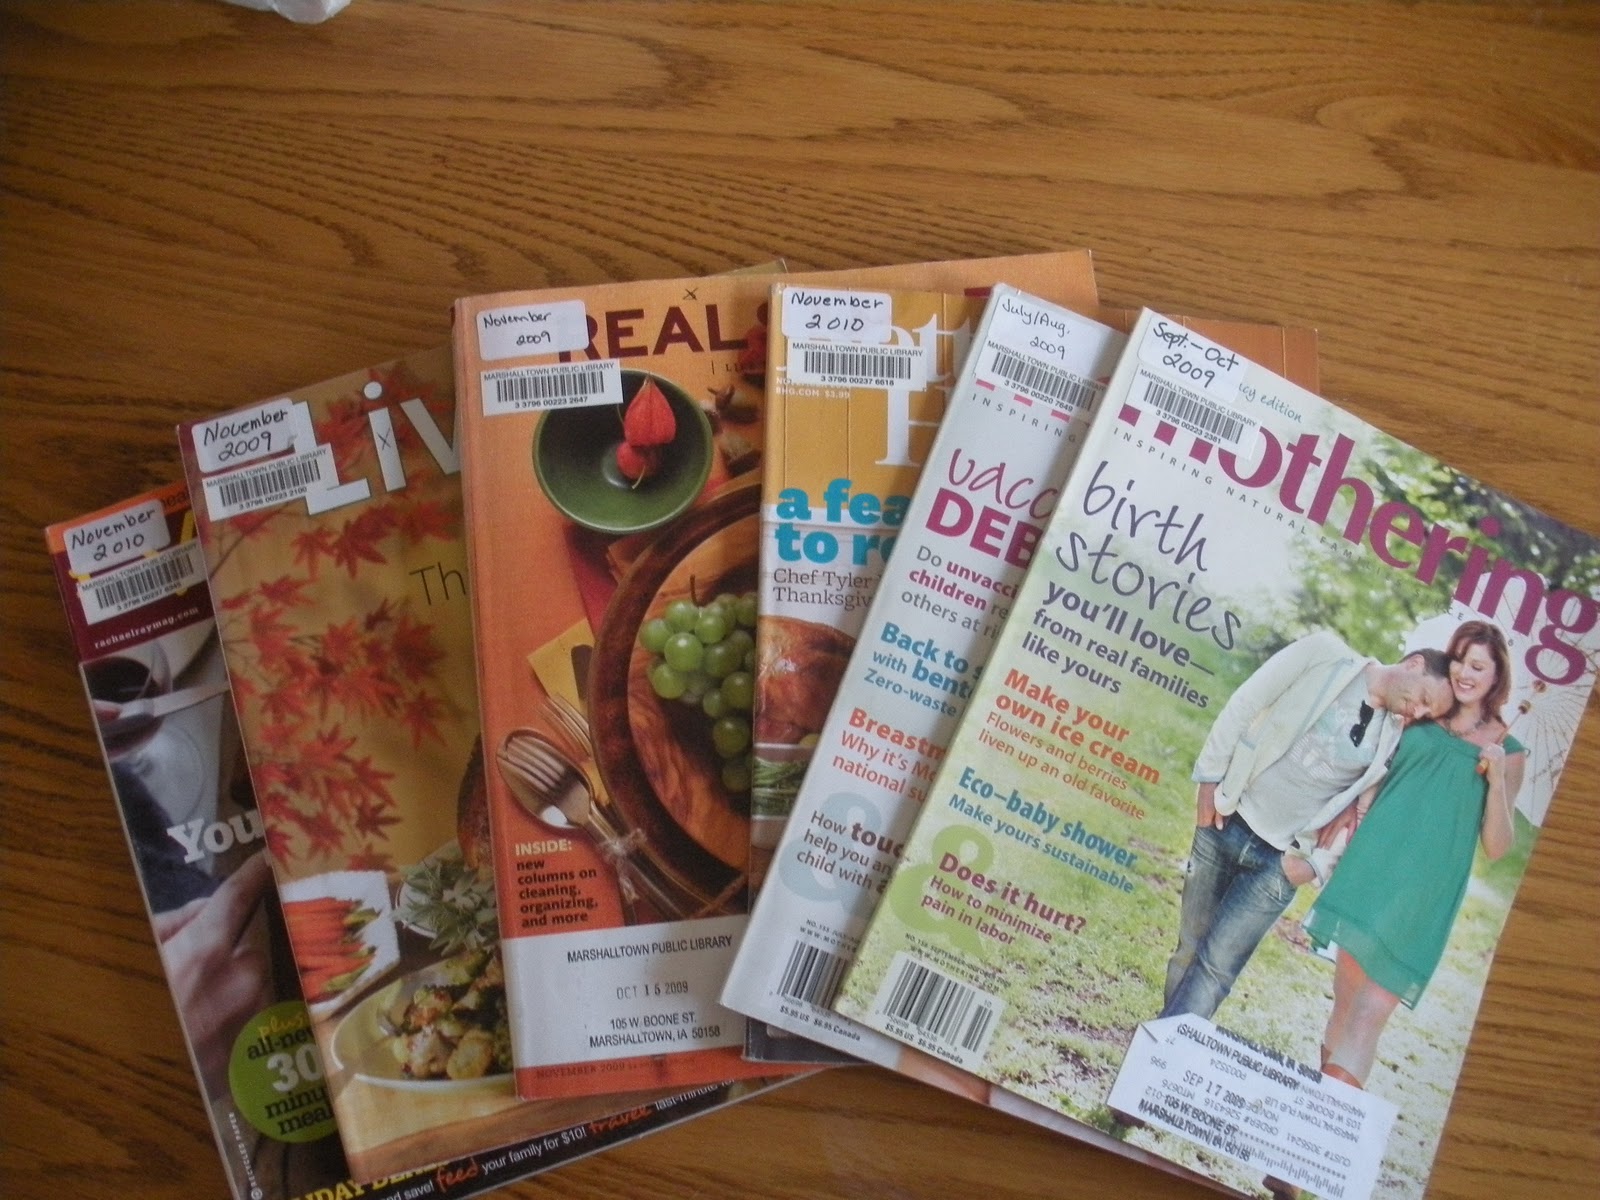
Fellow moms, what do you like to do when your family is snoozing on a slow Sunday afternoon?
Saturday, October 29, 2011
An Ada update!
It has been a very long time since I've blogged, and here is an update on what is happening in the life of Ada and Mommy!


Ada started saying "mama," "dada," but not always at the right time. She also looks for Charlie, and when she finds him she says "DA! DA! DA!" (yes, it does sound different from "dada") She loves to chase Charlie and play with him. Charlie is very tolerant of her.


She drinks out of her sippy cup all by herself like a big girl! She has also recently loved snuggling with me in our recliner and reading books together. It is one of my favorite activities every day!

Ada has 3 teeth, with her fourth ready to pop any day. People still comment (literally, everyday) on her gorgeous blue eyes and sweet spirit.

I made her a Halloween costume...can you figure out what she is????
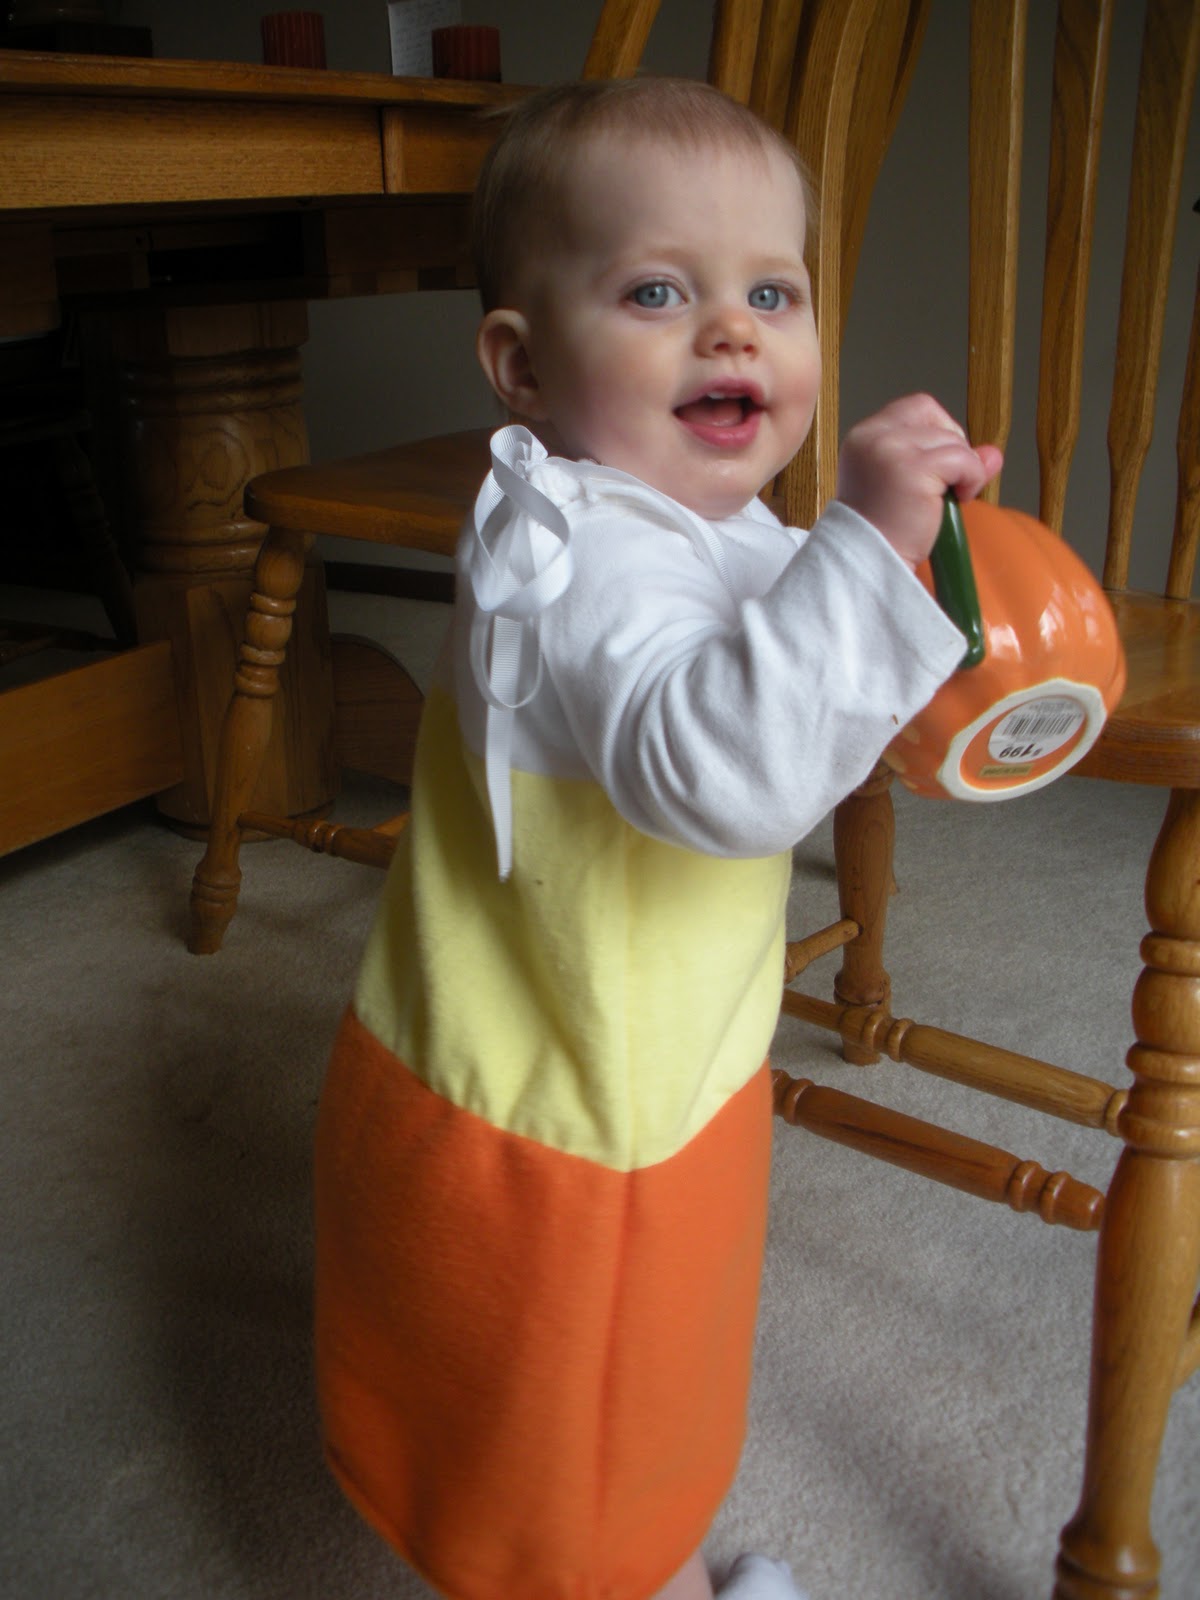

A candycorn! I had to choose something simple because I am a very amateur sewer (or seamstress?).
Ada started saying "mama," "dada," but not always at the right time. She also looks for Charlie, and when she finds him she says "DA! DA! DA!" (yes, it does sound different from "dada") She loves to chase Charlie and play with him. Charlie is very tolerant of her.


I'm an Aunt! My beautiful niece, Olive Adele Tittle, was born on October 11, 2011. She is a miracle baby, born premature at 34 weeks, but she has some great loving parents that are pouring their hearts and lives into her.

Lastly, God brought me a new job opportunity! I will be working as breastfeeding peer counselor for WIC! With this job I will support, encourage, and educate fellow moms about breastfeeding their babies! Yay! This job is a maximum of 6 hours per week, and Ada is allowed to be with me for most tasks, so being a homemaker is still most definitely my full time job.
Happy Halloween everyone!
Friday, October 28, 2011
Bye Bye Butt Wipes
Diaper wipes or socks? Diaper wipes or hat and gloves? Diaper wipes or book? Diaper wipes or shoes?
These are the questions that have been running through my mind the last few months. As Ada has gotten older, she has also gotten more expensive. Ten months ago all she needed was a warm blanket and her mommy. Now she needs socks, shoes, booster seat, baby gate, bigger clothes, toothbrush, etc. We have a baby budget of $30 per month to spend on all things baby. We are able to do this because we cloth diaper (we buy disposable diapers every 2-3 months). Now, diaper wipes only cost $5 to $7. Big deal, right? It's not that we can't afford to buy wipes, I'm annoyed buying them. I mean that $5 could make a bigger, long-lasting investment--like socks, or a hat, or a book, or a cute outfit, or potty training seat I found at a garage sale. I like investments, not throwing my money away. So began my adventure in cloth wipes.
Even if you don't cloth diaper, YOU can use cloth wipes! So easy!
What you need:
Old t-shirts, undies, onesies, any old smooth cotton cloth
squirt bottle (one that has a misty-spray nozzle, not a super-jet pressure nozzle)
water
baby lotion (optional)
1. Cut old clothing into square-ish shapes. You can cut them into any size you want, but I cut about 4-5" squares. You will need about 30 or so if you wash your little one's laundry once per week.
2. Fill the squirt bottle with water. If you like a little scent, add 10-20 squirts of your baby's scented lotion to the water and shake.
3. When it's time to change baby's diaper, give baby's bottom a few sprays, then wipe and pat dry with the cloth wipe.
4. Throw the cloth wipe (which will be hardly damp) into the hamper to get washed with baby's clothes, or in the diaper bucket if you cloth diaper.

I don't use cloth wipes for poopy diapers. Poopy messes are much easier to clean with wet disposable wipes and you can toss them in the trash when you're done. Another alternative to cut back on wipe usage is to cut your cloth wipes in half. I did this for awhile, and I went through a package of wipes much slower. Switching to cloth wipes you will probably save about $40 a year. Not a huge amount. But think of it this way, $40 is about 2 jumbo packs diapers, 4 adorable dresses, 6 board books, or a yoga class for yourself.
After reading this, you might be worried that I've given up on all things disposable--like toilet paper. Let me reassure you, we will definitely continue to use toilet paper, paper towels, tissues, and q-tips. In fact, I bet my husband will say this to me after he reads this post: "If you dislike disposable products so much then why don't you cut back on the amount of toilet paper you use?!" It's true, I tend to be a little wasteful with toilet paper, but I'm getting better at it, OK?!
Sunday, October 9, 2011
Playtime with Baby
I love hearing Ada giggle. Let me say that again. I LOVE LOVE LOVE hearing Ada giggle, seeing her flash a big gummy grin lights me up, and I think it's adorable when she chases me down (army crawling) and pulls at my toes to play with me. Playtime with my daughter is one of my favorite things about my job.
Sometimes though, I have no idea what to do with her! I can't wait for days when we can play the Wii together as a family, spend Chris' money at the mall, paint our nails, do arts and crafts, play hide and seek, etc. But right now, she's a baby. Our options are very limited. And TV is not an option for entertainment for her at this age.
This book, "Brain Games for Babies, Toddlers, and Twos" by Jackie Silberg has come to the rescue! It is filled with very intentional brain-development games that coordinate with their milestones and abilities. It is organized like a reference book and contains games from 0 months to 3 years you can play with baby. It also gives a brief description of the science/research behind the purpose of the game. Currently I have the book checked out from the library, but I am DEFINITELY going to buy this book sometime this year. Amazon is selling it for $3.99 (older versions for cheaper). I wish I would have known about this book when Ada was just a newbie!

But I've found that when all my tricks and games are exhausted (or I'm just exhausted), sticking Ada in front of the mirror keeps her entertained for quite a while!
Sometimes though, I have no idea what to do with her! I can't wait for days when we can play the Wii together as a family, spend Chris' money at the mall, paint our nails, do arts and crafts, play hide and seek, etc. But right now, she's a baby. Our options are very limited. And TV is not an option for entertainment for her at this age.
This book, "Brain Games for Babies, Toddlers, and Twos" by Jackie Silberg has come to the rescue! It is filled with very intentional brain-development games that coordinate with their milestones and abilities. It is organized like a reference book and contains games from 0 months to 3 years you can play with baby. It also gives a brief description of the science/research behind the purpose of the game. Currently I have the book checked out from the library, but I am DEFINITELY going to buy this book sometime this year. Amazon is selling it for $3.99 (older versions for cheaper). I wish I would have known about this book when Ada was just a newbie!
But I've found that when all my tricks and games are exhausted (or I'm just exhausted), sticking Ada in front of the mirror keeps her entertained for quite a while!
Thursday, October 6, 2011
Nuffin but a Muffin
I'm not a big believer of muffins or fruit breads for breakfast. With all the sugar and oil that's in them, they are actually cupcakes with fruit. And you just shouldn't eat cupcakes for breakfast, unless it's your birthday. I'm not saying to never enjoy banana bread or blueberry muffins, but they are more suitable for dessert or a treat. Don't feed you or your kids junk for the most important meal of the day!
It is possible to tweak the recipe in muffins and fruit breads, to make them more healthy, filling, and acceptable for breakfast. Many muffins and bread call for a LOT of sugar. Try adding HALF (or eliminate completely) of the sugar the recipe calls for, and add a little more fruit instead, and you'll notice that the bread or muffin is still pretty sweet and enjoyable. In fact, fructose (sugar in fruits and vegetables) is actually sweeter than sucrose (table sugar) Use whole wheat flour, oat, bran, or add flax seeds to add more fiber, iron, folic acid, protein, etc. It is also good to add nuts, unless your baby or toddler will be eating the treat too (choking hazard). Nuts are full of protein and good fats for your heart. Nuts can be expensive, but buy them when on sale and freeze them to extend their life.
I came up with this recipe (part of it is adapted from a Quaker Oats recipe) after Ada and I were so sick of eating Cheerios for breakfast. Ada doesn't eat a lot for breakfast in the morning, and will usually just eat about 1/3 c of Cheerios. I wanted to feed her something that was more healthy and hearty to start off her day. You can totally eliminate all the sugar from this recipe and your baby would still devour them. I kept some of the sugar (though I reduced the sugar about 90%) because Chris and I may enjoy one from time to time too. There is less than 1 teaspoon of sugar per muffin, so I feel comfortable letting Ada eat it. Your baby is ready to eat this muffin if they are self-feeding with finger foods, and has no allergies to wheat, eggs, or dairy. These muffins would also be great for a preggers lady who is experiencing morning sickness. Eat one of these with a big glass of milk before you go to bed to help hold you over until the morning.

Topping (optional):
1/4c oats (quick or old fashioned)
1/2T brown sugar (or less!)
1T butter or margarine, melted (or less!)
1/8t ground cinnamon
Muffins:
"Dry" ingredients:
1/2c oats
1 1/4c whole wheat flour
1t baking powder
3/4t baking soda
3/4t cinnamon
"Wet" ingredients:
2 4oz. jars unsweetened applesauce (or about 3/4c unsweetened applesauce)
1 4oz jar pureed banana (or 1 mashed very ripe banana)
1/2c grated carrot or zucchini (optional)
1/2c skim milk
2T brown sugar (optional)
3T vegetable oil
1 egg white, lightly beaten
Heat oven to 400 degrees. Line 12 medium muffin cups with baking cups. Combine ingredients for topping and set aside. Mix dry ingredients in a large bowl. Mix wet ingredients in medium bowl, then add to the dry ingredients all at once. Stir just until moistened, do not over-mix. Fill muffin cups almost full. Sprinkle with the topping, patting gently. Bake 20-22 minutes. Cool muffins in pan on wire rack 5 minutes. Remove from pan. These muffins freeze well.

It is possible to tweak the recipe in muffins and fruit breads, to make them more healthy, filling, and acceptable for breakfast. Many muffins and bread call for a LOT of sugar. Try adding HALF (or eliminate completely) of the sugar the recipe calls for, and add a little more fruit instead, and you'll notice that the bread or muffin is still pretty sweet and enjoyable. In fact, fructose (sugar in fruits and vegetables) is actually sweeter than sucrose (table sugar) Use whole wheat flour, oat, bran, or add flax seeds to add more fiber, iron, folic acid, protein, etc. It is also good to add nuts, unless your baby or toddler will be eating the treat too (choking hazard). Nuts are full of protein and good fats for your heart. Nuts can be expensive, but buy them when on sale and freeze them to extend their life.

Baby Breakfast Muffins
Topping (optional):
1/4c oats (quick or old fashioned)
1/2T brown sugar (or less!)
1T butter or margarine, melted (or less!)
1/8t ground cinnamon
Muffins:
"Dry" ingredients:
1/2c oats
1 1/4c whole wheat flour
1t baking powder
3/4t baking soda
3/4t cinnamon
"Wet" ingredients:
2 4oz. jars unsweetened applesauce (or about 3/4c unsweetened applesauce)
1 4oz jar pureed banana (or 1 mashed very ripe banana)
1/2c grated carrot or zucchini (optional)
1/2c skim milk
2T brown sugar (optional)
3T vegetable oil
1 egg white, lightly beaten
Heat oven to 400 degrees. Line 12 medium muffin cups with baking cups. Combine ingredients for topping and set aside. Mix dry ingredients in a large bowl. Mix wet ingredients in medium bowl, then add to the dry ingredients all at once. Stir just until moistened, do not over-mix. Fill muffin cups almost full. Sprinkle with the topping, patting gently. Bake 20-22 minutes. Cool muffins in pan on wire rack 5 minutes. Remove from pan. These muffins freeze well.
Enjoy! Ada sure is!

Wednesday, September 21, 2011
Bootylicious
As I'm writing this, Ada has become infatuated with my feet. She crawled over from the other side of the room, pulled off my warm slippers, tasted them, then started tickling my toes and putting them in her mouth! Then we play a little tug of war with my foot, while I try to tickle her with my toes. She's like a little playful kitten! Even better than a kitten!
Anyways, today's post: diaper rashes. Thankfully, Ada doesn't get diaper rashes very often, thanks to the breathable cotton cloth diaper. Prevention is the best remedy for diaper rashes. To prevent them, change a wet diaper every 2 to 3 hours, and change a poopy diaper immediately. Here are some things I've found helpful in treating a diaper rash:
Naked time! Get your baby butt naked! That rash needs to dry itself out and those buns need fresh air. And, babies LOVE being naked! Ada is twice as smiley and giggly when she gets to play naked, wouldn't you be?? If it's winter time, crank up the heat in your house for a few hours. If the weather is nice, lay her on a towel outside, when the sun's not too intense (morning) and in a little bit of shade. The sun is very effective in treating all kinds of skin diseases. Rashes hurt when things, such as diapers, rub up against them. So getting baby naked makes the rash much more bearable. If your baby can't move yet, lay out some thick towels and lay them naked on their back or tummy during their play time. If your baby is a mover like Ada, don't bother getting out any towels. Just get out a rag and maybe carpet cleaner to clean up any pee-pee or poo-poo messes she'll make. You might be horrified to think about your baby peeing on the carpet, and are shocked that I let her do it. First of all, baby pee is waaaay easier to clean up than dog or cat pee. Baby pee is nearly clear and odorless (unless it's like 3 pees on top of each other). Secondly, the end justifies the means. I don't mind cleaning up potty messes (you're saving yourself some diapers!) because I know the naked time is really helpful for her booty.
Mommy's milk! I am always fascinated with how amazing God made our human bodies. Breastmilk contains living antibodies which do search and destroy missions against anything harmful (viruses, bacteria). If you are breastfeeding, pump a little extra milk to put on baby's buns. This soothes and helps quickly heal the rash. If you give baby a nice warm bath, add some breastmilk to the water. One time Ada woke up with a rash on her face and her buns (probably something she ate). So in the morning I got her naked, put some breastmilk on her face and buns, and we sat outside on the deck in the shade. Within an hour, the rash on her face was 80% gone, and the rash on her buns was 60% better! I then gave her a bath with breastmilk added, which not only made her skin even softer but continued to aid the rashes. Her face rash was gone by the afternoon, and her diaper rash was gone the next day.
Ditch the wipes. When a baby has a diaper rash, they dread diaper changes because that's when mommy wipes their painful rash with a cold wipe! Ouch! I hate hearing Ada whimper in pain when this happens, so I don't use wipes at all. Instead, fill a squirt bottle with warm water, or 1 part baby lotion (preferably unscented as perfumes can be irritating) and 2 parts warm water and shake to mix. Under baby's bottom lay a towel or rag. Remove the diaper, spray (more like a gentle mist spray) buns clean with the warm water. If you don't have a squirt bottle, get a wet wash cloth with warm water and wring out the water over the buns. Gently pat baby's buns dry with the towel or rag you placed under her. Before putting the diaper back on her, use the diaper to fan her bottom dry. If your baby has a messy poopy, just stick her in the tub and spray her bottom clean.
Diaper rash cream. If your baby has a rash, always cover the rash in cream before putting on a diaper. You want to keep that rash "waterproof," and the cream helps make a barrier between the rash and the wet diaper. I really like A+D ointment cream. It works better on Ada than a zinc-oxide cream. Try different creams to see what works best for your baby. And here's a tip on applying the cream: use your ring finger to apply the cream. Your ring finger is your weakest finger, usually making it the most gentle when applying the cream. Also, when you use this finger, you are keeping your other fingers (pointer, middle, thumb) clean that you will use to secure the diaper on your baby.
Prayer! Lay your hands on your baby and pray for God to heal her tush. We've experienced and witnessed and believe in God's healing touch that we know we'd be silly not to ask God to heal her. He is so good and loving that He even cares about diaper rashes!
Lastly, these pictures are totally unrelated to diaper rashes, but I always like including pictures in my posts.
Here's a picture of us with Mrs. Hannah Al-Saygh, Ahmad Al-Saygh's (our good friend) mother. She came all the way from Qatar to visit Ames. We were so blessed to meet such a wonderful woman who was full of sincerity and life. She has a granddaughter Ada's age.


Anyways, today's post: diaper rashes. Thankfully, Ada doesn't get diaper rashes very often, thanks to the breathable cotton cloth diaper. Prevention is the best remedy for diaper rashes. To prevent them, change a wet diaper every 2 to 3 hours, and change a poopy diaper immediately. Here are some things I've found helpful in treating a diaper rash:
Naked time! Get your baby butt naked! That rash needs to dry itself out and those buns need fresh air. And, babies LOVE being naked! Ada is twice as smiley and giggly when she gets to play naked, wouldn't you be?? If it's winter time, crank up the heat in your house for a few hours. If the weather is nice, lay her on a towel outside, when the sun's not too intense (morning) and in a little bit of shade. The sun is very effective in treating all kinds of skin diseases. Rashes hurt when things, such as diapers, rub up against them. So getting baby naked makes the rash much more bearable. If your baby can't move yet, lay out some thick towels and lay them naked on their back or tummy during their play time. If your baby is a mover like Ada, don't bother getting out any towels. Just get out a rag and maybe carpet cleaner to clean up any pee-pee or poo-poo messes she'll make. You might be horrified to think about your baby peeing on the carpet, and are shocked that I let her do it. First of all, baby pee is waaaay easier to clean up than dog or cat pee. Baby pee is nearly clear and odorless (unless it's like 3 pees on top of each other). Secondly, the end justifies the means. I don't mind cleaning up potty messes (you're saving yourself some diapers!) because I know the naked time is really helpful for her booty.
Mommy's milk! I am always fascinated with how amazing God made our human bodies. Breastmilk contains living antibodies which do search and destroy missions against anything harmful (viruses, bacteria). If you are breastfeeding, pump a little extra milk to put on baby's buns. This soothes and helps quickly heal the rash. If you give baby a nice warm bath, add some breastmilk to the water. One time Ada woke up with a rash on her face and her buns (probably something she ate). So in the morning I got her naked, put some breastmilk on her face and buns, and we sat outside on the deck in the shade. Within an hour, the rash on her face was 80% gone, and the rash on her buns was 60% better! I then gave her a bath with breastmilk added, which not only made her skin even softer but continued to aid the rashes. Her face rash was gone by the afternoon, and her diaper rash was gone the next day.
Ditch the wipes. When a baby has a diaper rash, they dread diaper changes because that's when mommy wipes their painful rash with a cold wipe! Ouch! I hate hearing Ada whimper in pain when this happens, so I don't use wipes at all. Instead, fill a squirt bottle with warm water, or 1 part baby lotion (preferably unscented as perfumes can be irritating) and 2 parts warm water and shake to mix. Under baby's bottom lay a towel or rag. Remove the diaper, spray (more like a gentle mist spray) buns clean with the warm water. If you don't have a squirt bottle, get a wet wash cloth with warm water and wring out the water over the buns. Gently pat baby's buns dry with the towel or rag you placed under her. Before putting the diaper back on her, use the diaper to fan her bottom dry. If your baby has a messy poopy, just stick her in the tub and spray her bottom clean.
Diaper rash cream. If your baby has a rash, always cover the rash in cream before putting on a diaper. You want to keep that rash "waterproof," and the cream helps make a barrier between the rash and the wet diaper. I really like A+D ointment cream. It works better on Ada than a zinc-oxide cream. Try different creams to see what works best for your baby. And here's a tip on applying the cream: use your ring finger to apply the cream. Your ring finger is your weakest finger, usually making it the most gentle when applying the cream. Also, when you use this finger, you are keeping your other fingers (pointer, middle, thumb) clean that you will use to secure the diaper on your baby.
Prayer! Lay your hands on your baby and pray for God to heal her tush. We've experienced and witnessed and believe in God's healing touch that we know we'd be silly not to ask God to heal her. He is so good and loving that He even cares about diaper rashes!
Lastly, these pictures are totally unrelated to diaper rashes, but I always like including pictures in my posts.
Here's a picture of us with Mrs. Hannah Al-Saygh, Ahmad Al-Saygh's (our good friend) mother. She came all the way from Qatar to visit Ames. We were so blessed to meet such a wonderful woman who was full of sincerity and life. She has a granddaughter Ada's age.

This is Ada with Melinda Diehl and Vanessa Peterzen, some very good friends from my college days. They came to visit us and we had a girls' night this past weekend. So much fun!

Tuesday, September 6, 2011
Accomplishment
This past weekend we finished our bathroom remodel! Who doesn't love before and afters???
Before:
This is our main bathroom. The tub is light blue, walls are stark white, and the bathtub doesn't have a shower. It created an awkward situation when we hosted overnight guests because if they wanted to shower they had to use our shower in the master bedroom (we have a 3/4 bathroom in our bedroom). Also, with Ada getting bigger, we needed to transform the tub to be shower accessible so that it's easier to bathe Ada. Not to mention, I hate trying to shave my legs in the stand alone shower in our bedroom!


During:
We are sooooo fortunate to know Kyle and Sarah VanGorp. They came all the way from DES MOINES to help us! Kyle knows how to fix, remodel, rebuild, install anything and everything. Sarah has got very good taste and an eye for color complementing, interior design, and decorating. Chris and I wish we were like them! Together they have totally transformed their old, worn out forclosure house into a beautiful, updated and modern home! Check out their blog here. So, Kyle helped and taught Chris how to do plumbing stuff with the shower, and Sarah helped me with painting, decorating ideas, and etc. She was also great company while the men poured blood, sweat, and tears over the tub.


The After:
Taa-daahh!!! Dark fern green walls, dark chocolate covered trim and painted vanity, new shower hardware with a wall surround, the tub is painted white (with a tub and tile kit), and the mirror has a tile border. Total cost of everything: $361.09. And this included the pizza we ordered. Every time I step into the bathroom I feel like I'm stepping into a different house! This is the only room in our house that has color in it right now. The rest of the house is egg-shell white, with hardly anything on the walls.

I super-glued tile to make a border for this flat mirror. Stole this idea from my sister. Luckily, I found a tile pattern at Menard's that matched our color scheme perfectly! Total cost for this was about $30.


How does posting these pictures relate to this blog about motherhood? As a stay at home mom, I work all day, but feel like I have nothing to show for it at the end of the day. For example, I clean the kitchen, it gets dirty, I clean it again, after lunch its dirty, clean again. Or, clean diaper on, dirty diaper off, clean diaper on, dirty diaper off. Family's hungry, feed the family, family's hungry, feed the family. With my job, nothing is ever completely forever "done." In any other job outside of the home, you have task accomplishments. For example, with Chris' job, he talks to a customer, designs a playground, sells the playground, organizes the installation, and it's done. He has something to show for it. I don't regret my job or despise the nature of it. I do believe that the tasks I do to take care of our home and my family are important and meaningful, but I do miss having "accomplishments." Now, I don't have a need for "accomplishments" to justify my profession of being a stay at home mom. I feel really secure that this is where God has called me to be for this season of my life, and I love my job! But I miss the feeling you get when you have done something, and it's done forever, and you have something tangible to show for it. Even that piece of paper you receive after four years of college feels good to look at, doesn't it? That's the sense of accomplishment that I miss. That's one of the reasons I loved doing this project. It breaks me out of the mundane, is an outlet for my creativity, and I can say, "Look! I did this!" Through this I've discovered my need to do fun projects, be it a bath remodel or a sewing project or painting, for the sake of enjoyment in breathing out a long sigh, wearing a proud smile on my face, and saying "I'm done!"
Monday, August 8, 2011
The Self-Cleaning Microwave
Don't you wish your microwave had a self-cleaning function like your oven? I mean, microwaves get dirtier and more quickly than ovens, and are used twice as much. One thing I can't stand is a dirty microwave. I feel so yucky when I open up a microwave and get punched in the face with the smell of popcorn and garbage disposal, and then have to set my food in a box that looks like someone blew their chunks into. Of course, the best way to keep a microwave clean is to clean it after every food explosion. But sometimes the baby's crying, the pot's boiling over, the phone is ringing, and you're running late to the doctor's office, and you just can't get to it right then. Then, by the time you are able to get to it, the splattered food is plastered-stuck on to the walls of it. Bending 90 degrees over the counter with a scraper and a bowl of soapy water is not something anyone enjoys doing. Couldn't you just scream, "You made this mess, YOU clean it up!" at your microwave?
Fortunately, your microwave can help you with the hardest part of restoring it's cleanliness. Here's how:
After you're done washing dishes or wiping down the counter with your dishrag or sponge, rinse the remaining crumbs or grime off of it, then wring most, but not all, of the water out. Stick the dishrag in the microwave, and microwave it on high for three minutes. This sanitizes your dishrag and prevents it from getting smelly.

When the microwave beeps, carefully remove the dishrag (it will be very hot) and drape it over the faucet to let air dry. You will notice that your microwave is steamy and a lot of moisture has accumulated, thus soaking the hardened stuck on food.

Get one sheet of paper towel, and begin to wipe all the walls of the microwave (starting with the ceiling wall) and the microwave plate. You will notice that the messes glide right off. If needed, you can dampen the paper towel if some food is really stuck. Done!

So, there you go. You handed your microwave a wet rag and told it to get to work on cleaning up the mess it caused. AND, you sanitized your dish rag.

Subscribe to:
Posts (Atom)